

When it comes to window tinting, many car and homeowners face a crucial decision: Should you opt for DIY window tinting or hire a professional? This decision often depends on balancing cost savings with the desire for top-notch results. Professional window tint installation ensures expertise and ease, but can be more expensive. On the other hand, DIY window tint installation can be more affordable but comes with risks like air bubbles, wrinkles, and potential legal issues if not done correctly. In this guide, we’ll explore the pros and cons of both options to help you make the best choice for your needs and budget.
In this comprehensive guide, we’ll delve into the pros and cons of both options, explore costs, quality, impact on vehicles, and more. By the end of this article, you’ll have a clear understanding of which method suits your needs and budget best.
Understanding Window Tinting
What is Window Tinting?
Window tinting involves applying a thin film to the interior or exterior of your windows. This film reduces the amount of sunlight and UV radiation that can penetrate through the glass. There are several types of window tint films available, including ceramic, metallic, dyed, and hybrid options. Each type offers varying levels of UV protection, heat reduction, and privacy.
Types of Window Tint Films:
- Ceramic: Offers excellent UV protection and heat reduction without affecting visibility.
- Metallic: Reflects heat and UV rays but can interfere with electronic signals.
- Dyed: Provides a darker appearance and basic UV protection at an affordable cost.
- Hybrid: Combines metallic and dyed films for balanced performance.
Benefits of Window Tinting
Window tinting offers several advantages beyond just aesthetic appeal. Here are some key benefits:
- UV Protection: Tint films block harmful UV rays, protecting your skin and reducing the risk of interior fading.
- Heat Reduction: Tinted windows can significantly reduce heat inside your vehicle or home, enhancing comfort.
- Privacy: Tinted windows provide added privacy, making it harder for outsiders to see inside.
- Aesthetics: Enhances the overall look of your vehicle or home, giving it a sleek and stylish appearance.
By understanding these benefits, you can better appreciate the value of window tinting, whether you choose to go the DIY route or hire a professional.
Exploring DIY Window Tint Installation
The Basics of DIY Window Tinting
DIY window tinting involves purchasing a tint kit and applying the film yourself. This process requires careful preparation and attention to detail. Here are the basic steps involved in DIY window tinting:
- Preparation: Clean the windows thoroughly to remove any dirt, dust, or debris. This is crucial to ensure the film adheres properly and looks smooth.
- Measurement: Measure the windows accurately and cut the tint film to the correct size. It’s important to leave a little extra film on the edges to trim later.
- Application: Apply a soapy water solution to the window and the adhesive side of the film. This solution allows you to slide the film into place and remove air bubbles.
- Smoothing: Use a squeegee to smooth out the film and remove any air bubbles or excess water. Start from the center and work your way to the edges.
- Trimming: Trim the excess film from the edges using a sharp knife or blade. Be careful to follow the window’s contour precisely.
- Drying: Allow the film to dry completely, which can take a few days. Avoid rolling down windows during this time if you are tinting a car.
Advantages of DIY Window Tinting
DIY window tinting offers several benefits that make it an attractive option for many:
- Cost Savings: The primary advantage is cost savings. DIY kits are significantly cheaper than hiring a professional. This can be appealing for those on a tight budget.
- Flexible Scheduling: You can tint your windows at your own pace and on your own schedule. There’s no need to book an appointment or wait for availability.
- Personal Satisfaction: Completing the project yourself can be very satisfying. It’s a great way to develop new skills and take pride in your work.
- Customization: You have full control over the process and can customize the tint to your exact preferences.
Challenges of DIY Window Tinting
Despite its advantages, DIY window tinting comes with several challenges:
- Skill and Experience: Achieving a professional-quality finish requires skill and experience. Beginners may struggle with air bubbles, wrinkles, and uneven application.
- Time-Consuming: The process can be time-consuming, especially for first-timers. Preparation, application, and drying can take several hours or even days.
- Quality of Materials: DIY kits may include lower-quality films that don’t last as long as professional-grade materials. This can lead to peeling, fading, or bubbling over time.
- Need for Specialized Tools: Proper tools are essential for a smooth installation. If you don’t have the right tools, you may need to purchase or rent them, adding to the overall cost.
- Legal Compliance: Understanding and adhering to local tinting laws can be challenging. Installing a tint that is too dark or otherwise non-compliant can result in fines and the need to remove and replace the film.
Common DIY Mistakes and How to Avoid Them
- Improper Window Cleaning: Not cleaning the windows thoroughly can result in dirt and debris getting trapped under the film. Always clean the windows with a suitable cleaner and ensure they are spotless.
- Incorrect Film Cutting: Cutting the film inaccurately can lead to gaps or overlapping edges. Measure carefully and use a sharp blade for precise cuts.
- Air Bubbles and Dust Particles: These can ruin the appearance of the tint. Use a squeegee to smooth out bubbles and apply the film in a dust-free environment.
- Misapplication: Applying the film incorrectly can result in wrinkles and misalignment. Take your time and follow the instructions carefully.
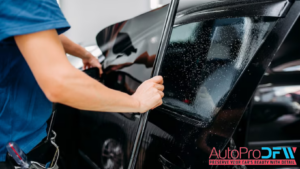
The Professional Window Tint Installation Process
What to Expect from Professional Installation
Opting for professional window tint installation ensures a smooth and hassle-free experience. Here’s what you can typically expect during the process:
- Consultation: A professional installer will first consult with you to understand your needs and preferences. They will discuss the types of films available and recommend the best options based on your requirements.
- Preparation: The installer will clean the windows thoroughly to remove any dust, dirt, or residues. This step is crucial for ensuring the film adheres properly and looks flawless.
- Precision Cutting: Professionals use advanced tools and techniques to cut the film precisely to fit your windows. This ensures a perfect fit without gaps or overlaps.
- Application: The film is applied using a soapy water solution that allows it to be positioned correctly. Professionals use specialized tools to smooth out the film and remove any air bubbles or excess water.
- Drying and Curing: Once the film is applied, it needs time to dry and cure. Professionals ensure that the installation environment is optimal for this process, avoiding issues like bubbles or peeling.
- Final Inspection: After the film has dried, the installer will inspect the windows to ensure the application is flawless. They will make any necessary adjustments and ensure you are satisfied with the results.
Benefits of Hiring a Professional
Choosing a professional for your window tint installation offers several significant advantages:
- Expertise and Experience: Professionals have the necessary skills and experience to achieve a perfect finish. They understand the nuances of different window shapes and film types, ensuring optimal results.
- High-Quality Materials: Professional installers have access to top-grade films that are more durable and effective than those in DIY kits. These films offer better UV protection, heat reduction, and longevity.
- Warranties and Guarantees: Most professional installations come with warranties and guarantees, providing peace of mind. If there are any issues with the tint, such as peeling or bubbling, they will be addressed at no additional cost.
- Time-Saving and Convenience: Professional installation is faster and more efficient. You save time and avoid the hassle of doing it yourself.
- Compliance with Legal Regulations: Professionals are knowledgeable about local tinting laws and regulations. They ensure that the tint is compliant, avoiding potential fines or the need for reinstallation.
Potential Drawbacks of Professional Installation
While professional installation offers many benefits, there are also some potential drawbacks to consider:
- Higher Initial Cost: Professional services are more expensive than DIY kits. The cost can vary based on the type of film, the size of your vehicle or home, and the installer’s experience.
- Scheduling and Availability: You need to schedule an appointment, which may not always be convenient. There can also be waiting times, especially with popular or highly-rated installers.
- Less Personal Control: With professional installation, you have less control over the process compared to doing it yourself. You rely on the installer to meet your specific preferences and standards.
- Trust and Reliability: Finding a trustworthy and reliable installer can be challenging. It’s essential to research and choose a reputable professional to avoid potential issues.
Cost Analysis: DIY vs. Professional Window Tinting
Comparing Initial Costs
One of the most significant factors influencing the decision between DIY and professional window tinting is the initial cost. Here’s a detailed comparison:
DIY Window Tinting:
- Tint Kits: DIY kits typically cost between $20 and $150, depending on the quality and brand. These kits usually include the film, a squeegee, and a knife.
- Tools and Supplies: Additional tools like spray bottles, specialized cleaning solutions, and precision cutting tools might add another $10 to $50.
- Total Initial Cost: For a standard-sized car, expect to spend between $30 and $200 on a complete DIY setup.
Professional Window Tinting:
- Installation Fees: Professional installation costs vary based on the vehicle’s size, the type of film used, and the region. Prices typically range from $100 to $400 for a standard-sized car.
- Film Quality: High-end films like ceramic or metallic can increase the price, potentially reaching $500 or more for premium services.
- Total Initial Cost: For professional installation, expect to spend between $100 and $500, depending on various factors.
| Cost Component | DIY Window Tinting | Professional Window Tinting |
| Tint Kit | $20 – $150 | Included in service fee |
| Tools and Supplies | $10 – $50 | Included in service fee |
| Installation Fee | N/A | $100 – $400 |
| Total Initial Cost | $30 – $200 | $100 – $500 |
Evaluating Long-Term Costs
Initial costs are only part of the equation. Long-term costs can also significantly impact your decision. Here’s how they compare:
DIY Window Tinting:
- Potential Mistakes: Mistakes during installation can lead to additional costs for film replacement or professional removal and reinstallation. Correcting mistakes might cost an extra $50 to $200.
- Durability and Maintenance: Lower-quality films might peel, fade, or bubble over time, requiring more frequent replacements. Over a few years, you might spend an additional $100 to $300 on maintenance and replacement.
Professional Window Tinting:
- Longevity: Professional-grade films and installations typically last longer, reducing the need for replacements. This can save you money in the long run.
- Warranties and Guarantees: Professional services often include warranties that cover issues like peeling or bubbling, minimizing unexpected costs. These warranties can last from 5 years to a lifetime, depending on the installer and film quality.
| Cost Component | DIY Window Tinting | Professional Window Tinting |
| Correction of Mistakes | $50 – $200 | Covered by warranty |
| Replacement and Maintenance | $100 – $300 | Minimal due to durability |
| Long-Term Cost | $150 – $500 | $0 – $100 |
Summary
While DIY window tinting may offer lower initial costs, potential mistakes and the need for frequent maintenance can add up over time. Professional window tinting, though more expensive upfront, can be more cost-effective in the long run due to higher durability and warranties.
By considering both initial and long-term costs, you can make a more informed decision based on your budget and needs.
Assessing Quality and Outcome
Material Quality
The quality of the window tint film is a critical factor in determining the overall success of the installation, whether DIY or professional.
DIY Window Tinting:
- Variety of Films: DIY kits often come with a variety of films, but these are usually lower in quality compared to professional-grade materials. Common DIY films include basic dyed films, which may fade over time.
- Limited Options: While some high-quality DIY films are available, they can be harder to find and more expensive.
- Durability Concerns: Lower-grade films are more prone to bubbling, peeling, and discoloration over time, especially when exposed to harsh weather conditions.
Professional Window Tinting:
- Premium Materials: Professionals have access to high-quality films, such as ceramic, metallic, and hybrid films. These materials offer superior UV protection, heat reduction, and longevity.
- Durability and Warranty: Professional-grade films are designed to last longer and often come with warranties that cover defects and installation issues, providing peace of mind and reducing long-term costs.
Precision and Finish
The skill level and experience of the installer play a significant role in the final appearance of the window tint.
DIY Window Tinting:
- Varied Results: The quality of a DIY tint job largely depends on the individual’s skill and experience. Beginners may struggle with achieving a smooth, bubble-free finish.
- Common Issues: Air bubbles, wrinkles, and uneven cuts are common problems in DIY installations. These imperfections can detract from the appearance and functionality of the tint.
Professional Window Tinting:
- Expert Techniques: Professionals use advanced tools and techniques to ensure a flawless application. Their experience allows them to handle complex window shapes and sizes with ease.
- Consistent Quality: Professional installations typically result in a smooth, bubble-free finish with no visible imperfections. The edges are precisely cut to fit the window perfectly, enhancing both the appearance and performance of the tint.
Longevity and Durability
The lifespan of the window tint is another crucial factor to consider.
DIY Window Tinting:
- Shorter Lifespan: Lower-quality films and potential installation errors can reduce the lifespan of a DIY tint. You may need to replace the tint more frequently, adding to the overall cost.
- Maintenance Needs: DIY tints may require more maintenance to keep them looking good and functioning properly. Regular checks for bubbles, peeling, and discoloration are necessary.
Professional Window Tinting:
- Longer Lifespan: High-quality films and professional installation techniques ensure that the tint lasts longer. Many professional tints come with warranties that can last up to the lifetime of the vehicle or home.
- Minimal Maintenance: Professionally installed tints require minimal maintenance. They are more resistant to bubbling, peeling, and fading, maintaining their appearance and effectiveness over time.
Summary
When comparing the quality and outcome of DIY vs. professional window tinting, it’s clear that professional installations offer superior materials, precision, and durability. While DIY projects can be satisfying and cost-effective initially, the potential for mistakes and the need for frequent maintenance can detract from the overall benefits.
Impact on Your Vehicle: DIY vs. Professional Tinting
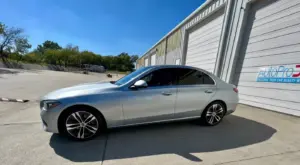
Aesthetic Appeal
The visual impact of window tinting is often a primary consideration for car owners. Both DIY and professional installations can enhance the look of your vehicle, but there are notable differences.
DIY Window Tinting:
- Varied Results: The final look of a DIY tint job can vary greatly based on the installer’s skill and experience. While some DIY enthusiasts achieve professional-looking results, many face issues such as uneven tint, visible air bubbles, and rough edges.
- Potential Imperfections: Common aesthetic issues with DIY tinting include bubbles, wrinkles, and misalignment. These imperfections can make the tint look unprofessional and detract from the vehicle’s overall appearance.
Professional Window Tinting:
- Flawless Finish: Professional installers have the expertise to deliver a flawless finish. They ensure that the film is applied smoothly and precisely, with no visible bubbles or edges.
- Consistent Quality: The consistent quality of a professional job means your vehicle will have a sleek and uniform appearance, enhancing its overall aesthetic appeal.
Functional Benefits
Window tinting offers several functional benefits, including heat reduction, UV protection, and increased privacy. The effectiveness of these benefits can differ between DIY and professional installations.
DIY Window Tinting:
- Basic Protection: DIY kits often provide basic UV and heat protection, which can improve comfort and protect your vehicle’s interior to some extent.
- Inconsistent Performance: The performance of DIY tints can be inconsistent. Poor application techniques can lead to areas where the tint is less effective, reducing its overall benefits.
Professional Window Tinting:
- Enhanced Protection: Professional-grade films offer superior UV and heat protection, significantly improving comfort and safeguarding your vehicle’s interior from sun damage.
- Optimal Performance: The precise application techniques used by professionals ensure that the tint performs optimally, providing consistent protection across all windows.
Legal Compliance and Safety
Adhering to local tinting laws and ensuring safety are crucial aspects of window tinting. Both DIY and professional installations must comply with legal regulations, but there are differences in ease and assurance.
DIY Window Tinting:
- Legal Risks: DIY installers might not be fully aware of local tinting laws, leading to the application of films that are too dark or otherwise non-compliant. This can result in fines or the need to remove and replace the tint.
- Safety Concerns: Improperly installed tints can affect visibility, especially at night or in bad weather. Bubbles and wrinkles can distort vision, posing safety risks.
Professional Window Tinting:
- Compliance Assurance: Professionals are knowledgeable about local tinting laws and ensure that the installed tint complies with all regulations. This eliminates the risk of fines and legal issues.
- Safety Standards: Professional installations are done with safety in mind. The precise application reduces the risk of visibility issues, ensuring that your driving experience remains safe.
Summary
The impact of DIY vs. professional window tinting on your vehicle is significant. While DIY tinting can offer basic benefits and a sense of accomplishment, professional installations provide superior aesthetic results, enhanced functional benefits, and compliance with legal standards. For those prioritizing long-term quality and peace of mind, professional window tinting is the clear choice.
Safety Considerations in Window Tinting
Visibility and Driving Safety
The primary concern with window tinting, whether DIY or professional, is ensuring that the tint does not impede visibility and compromise driving safety.
DIY Window Tinting:
- Potential Visibility Issues: Improper installation can lead to bubbles, wrinkles, and misalignment, all of which can distort your view through the windows. This is particularly hazardous for the front and side windows, which are crucial for safe driving.
- Inconsistent Tint Darkness: Inconsistent application can result in varying levels of tint darkness, which might affect night driving or driving in poor weather conditions. Too dark a tint can make it difficult to see clearly, especially in low-light situations.
- Risk of Glare: Poorly applied tints might not adequately reduce glare, which can strain the eyes and cause discomfort while driving.
Professional Window Tinting:
- Clear Visibility: Professional installers ensure that the tint is applied evenly and smoothly, eliminating issues like bubbles and wrinkles that can distort vision. This maintains clear visibility through the windows.
- Optimal Tint Levels: Professionals choose and apply the correct level of tint darkness that enhances visibility and reduces glare without compromising safety. They ensure that the tint is consistent across all windows.
- Safety Protocols: Professional installations follow strict safety protocols to ensure that the tint does not obstruct the driver’s view, providing a safer driving experience.
Professional Standards and Safety Protocols
Adhering to safety standards and protocols is essential for a successful and safe window tint installation.
DIY Window Tinting:
- Lack of Professional Guidance: DIY installers may not be aware of the safety standards and protocols required for proper window tinting. This can lead to installations that are not only visually unappealing but also unsafe.
- No Quality Assurance: Without professional oversight, there is no guarantee that the tint will meet safety standards, increasing the risk of issues that could compromise safety.
Professional Window Tinting:
- Trained Technicians: Professional installers are trained and certified to apply window tints according to industry safety standards. Their expertise ensures that the tint is applied correctly and safely.
- Quality Assurance: Professionals provide a level of quality assurance that DIY installations cannot match. They guarantee that the tint will not only look good but also meet all safety requirements.
- Use of High-Quality Materials: Professional installations use high-quality films that are designed to enhance safety by reducing glare and improving visibility. These materials are more durable and effective than those typically found in DIY kits.
Summary
Safety is a critical consideration in window tinting, and the differences between DIY and professional installations are significant. DIY projects can lead to visibility issues and inconsistent tint levels, posing potential safety risks. In contrast, professional installations ensure clear visibility, optimal tint levels, and adherence to safety standards, providing a safer and more reliable outcome.
Making an Informed Decision: DIY vs. Professional
Self-Assessment of Skills and Tools
Deciding between DIY and professional window tinting starts with an honest assessment of your skills and the tools you have.
DIY Window Tinting:
- Skill Level: Do you have experience with similar DIY projects? Window tinting requires precision and patience. If you’re comfortable with detailed tasks, you might enjoy the challenge.
- Tools: Ensure you have the necessary tools like a squeegee, sharp knife, and a spray bottle. These are crucial for a smooth installation. Many DIY kits come with basic tools, but you might need to purchase additional items for better results.
Professional Window Tinting:
- No Experience Needed: You don’t need any special skills or tools. The professionals handle everything for you.
- Guaranteed Results: With professional installation, you can expect a flawless finish without worrying about the details.
Budget Considerations
Your budget plays a significant role in your decision.
DIY Window Tinting:
- Cost Savings: DIY kits are cheaper upfront. If you’re on a tight budget, this might be the most appealing option.
- Potential Additional Costs: Consider the cost of fixing mistakes or replacing poor-quality film. These can add up over time.
Professional Window Tinting:
- Higher Initial Cost: Professional services are more expensive initially.
- Long-Term Value: High-quality materials and expert installation mean fewer replacements and repairs, potentially saving you money in the long run.
Priorities and Preferences
Think about what matters most to you in the window tinting process.
DIY Window Tinting:
- Personal Satisfaction: There’s a unique satisfaction in completing a project yourself. If you enjoy DIY projects, this can be a rewarding experience.
- Flexibility: You can work on your own schedule, taking as much time as you need.
Professional Window Tinting:
- Convenience: Professionals handle everything, saving you time and effort. If you prefer convenience and peace of mind, this is a great option.
- Quality Assurance: Professional installations come with warranties and guarantees, ensuring you get the best results without any hassle.
Summary
When deciding between DIY and professional window tinting, consider your skills, budget, and personal preferences. If you enjoy DIY projects and want to save money upfront, a DIY kit might be right for you. However, if you value convenience and guaranteed results, professional installation is worth the investment.
Tips for Successful DIY Window Tint Installation
If you decide to go the DIY route, here are some helpful tips to ensure a successful window tint installation. Remember, patience and attention to detail are key to achieving great results.
Preparation Tips
Proper preparation is essential for a smooth installation process.
- Thorough Cleaning: Start by cleaning your windows thoroughly. Any dirt, dust, or residue can cause bubbles and imperfections. Use a reliable glass cleaner and a lint-free cloth to ensure the windows are spotless.
- Gathering Tools: Make sure you have all the necessary tools before you begin. This includes a squeegee, a sharp knife, a spray bottle with a soapy water solution, and the tint film. Having these tools on hand will make the process smoother and more efficient.
- Cutting the Film: Carefully measure your windows and cut the tint film to the correct size. It’s best to cut the film slightly larger than needed so you can trim it precisely once it’s on the window.
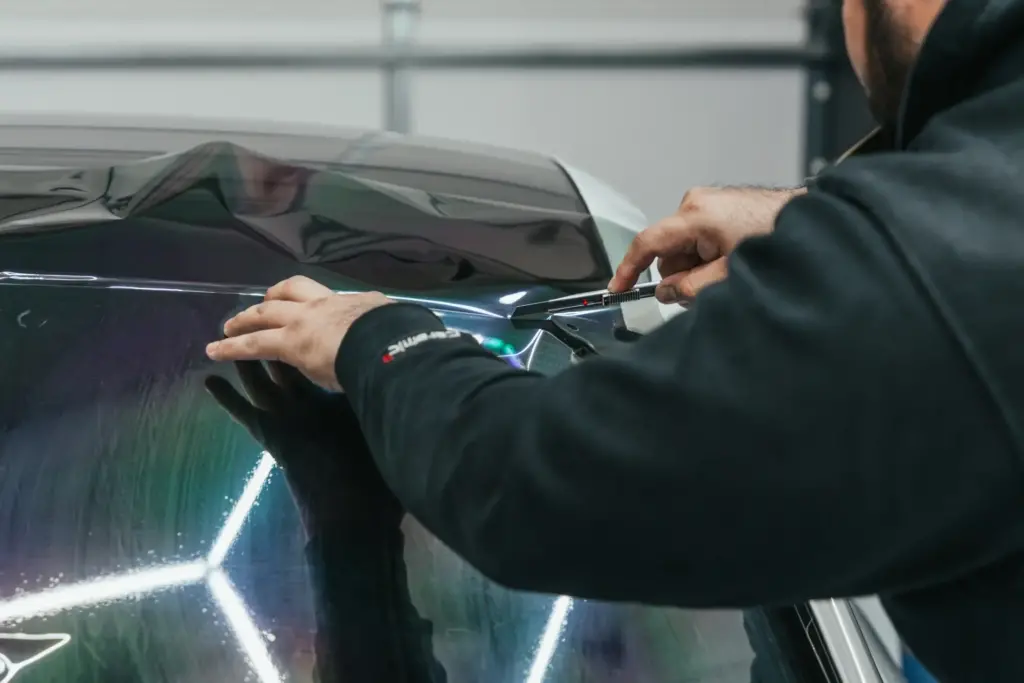
Application Techniques
Applying the tint film requires patience and precision. Follow these steps for the best results:
- Wet the Window: Spray the window with the soapy water solution. This will help the film slide into place and make it easier to remove any bubbles.
- Peel and Apply: Carefully peel the backing off the tint film and apply it to the wet window. Start at the top and work your way down, smoothing the film as you go.
- Squeegee Out Bubbles: Use a squeegee to remove any air bubbles and excess water. Start from the center and work your way to the edges. Take your time to ensure all bubbles are removed.
- Trim the Edges: Once the film is in place, use a sharp knife to trim any excess around the edges of the window. Be careful to follow the window’s contour for a precise fit.
Post-Installation Care and Maintenance
Taking care of your newly tinted windows will help ensure they last and look great.
- Allow Time to Dry: After applying the film, allow it to dry completely. This can take a few days. Avoid rolling down windows during this time if you’re tinting your car.
- Cleaning: Clean your tinted windows with a gentle cleaner and a soft cloth. Avoid using harsh chemicals or abrasive materials that could damage the film.
- Inspect Regularly: Check your tinted windows regularly for any signs of peeling or bubbling. Address any issues promptly to maintain the appearance and effectiveness of the tint.
Summary
With careful preparation, precise application, and proper maintenance, you can achieve great results with DIY window tinting. This hands-on project can be satisfying and rewarding, especially when you see the improved look and feel of your windows.
How to Choose a Professional Window Tint Installer
Choosing a professional window tint installer is crucial for ensuring high-quality results and peace of mind. Here are some tips to help you find a reliable and experienced installer.
Researching and Finding Reputable Installers
Start by gathering information on potential installers in your area.
- Online Reviews and Ratings: Look for installers with positive reviews and high ratings on websites like Google, Yelp, and Angie’s List. Customer feedback can give you insights into the quality of their work and customer service.
- Ask for Recommendations: Ask friends, family, or coworkers if they have any recommendations. Personal experiences can be very trustworthy.
- Check Credentials: Ensure the installer is certified and licensed. This indicates they have the necessary training and adhere to industry standards.
Important Questions to Ask
Before making a decision, ask potential installers the following questions to gauge their expertise and reliability:
- What Type of Films Do You Use?: Ensure they use high-quality, durable films. Ask about the different options available and their benefits.
- Do You Offer Warranties?: A reputable installer should offer warranties on both the film and the installation. This provides protection against defects and installation issues.
- Can I See Examples of Your Work?: Viewing past projects can help you assess the quality of their workmanship. Look for smooth, bubble-free applications with precise edges.
- What is Your Experience Level?: Inquire about their experience and training. More experienced installers are likely to deliver better results.
Evaluating Quotes and Services
Compare quotes and services from multiple installers to find the best value.
- Get Multiple Quotes: Request quotes from several installers to compare prices and services. Be wary of prices that seem too good to be true, as they might indicate lower quality work or materials.
- Understand What’s Included: Ensure the quote includes all necessary services, such as cleaning, film application, and post-installation inspection. Ask if there are any potential additional costs.
- Assess the Customer Service: Pay attention to how the installer communicates with you. Good customer service is indicative of their professionalism and willingness to address any concerns.
Summary
Choosing the right professional window tint installer involves careful research and asking the right questions. Look for reputable installers with positive reviews, high-quality materials, and comprehensive warranties. Comparing quotes and assessing customer service can help you find the best value for your investment.
FAQs About DIY vs. Professional Window Tint Installation
What is the best type of window tint film for DIY installation?
Answer: The best type of window tint film for DIY installation is typically a dyed or hybrid film. Dyed films are more affordable and easier to handle, making them ideal for beginners. Hybrid films combine dyed and metallic elements, offering better heat rejection and durability while still being manageable for DIY enthusiasts. Avoid ceramic or metallic films unless you have prior experience, as they can be more challenging to work with.
How long does a professional window tint installation take?
Answer: A professional window tint installation typically takes between 2 to 4 hours, depending on the size and complexity of the job. For a standard car, the process usually takes around 2 hours. Larger vehicles or those with more complex window shapes may require additional time. It’s best to consult with your installer for a more accurate time estimate.
Can I remove window tint myself if I make a mistake?
Answer: Yes, you can remove window tint yourself if you make a mistake. The process involves using a heat source, like a hairdryer or heat gun, to soften the adhesive, making it easier to peel off the film. After removing the film, you will need to clean the window thoroughly to remove any remaining adhesive residue. However, this process can be time-consuming and may require multiple attempts to remove all adhesive completely.
Are there any legal restrictions on window tinting in my area?
Answer: Yes, there are legal restrictions on window tinting that vary by location. These laws dictate the maximum allowable tint darkness (measured by Visible Light Transmission, or VLT) for different windows on your vehicle. It’s crucial to check your local tinting laws before installation to ensure compliance and avoid potential fines. Professional installers are usually familiar with these regulations and can ensure your tint meets legal standards.
How can I ensure my DIY window tint lasts as long as possible?
Answer: To ensure your DIY window tint lasts as long as possible, follow these tips:
- Quality Film: Use high-quality tint film designed for durability and longevity.
- Proper Installation: Follow the installation instructions carefully, ensuring a clean and bubble-free application.
- Drying Time: Allow the film to dry completely before rolling down windows or exposing it to moisture.
- Gentle Cleaning: Clean the tinted windows with a mild cleaner and a soft cloth. Avoid using abrasive materials or harsh chemicals.
- Regular Inspection: Periodically check for signs of peeling or bubbling and address any issues promptly to prevent further damage.
Summary
By addressing these common questions, we hope to provide clarity and confidence for those considering DIY or professional window tint installation. Understanding the best practices and legal considerations can help you achieve the best results and enjoy the benefits of tinted windows.
Conclusion
Choosing between DIY and professional window tinting depends on your budget, skills, and priorities.
DIY window tinting offers cost savings and the satisfaction of completing the project yourself, but it requires precision and carries the risk of mistakes without the safety net of a warranty.
Professional window tinting, while more expensive upfront, ensures a high-quality finish, durability, and comes with the peace of mind provided by warranties and expert installation.
For those confident in their DIY skills and looking to save money, DIY can be a rewarding challenge. However, for guaranteed results and convenience, professional installation is the better choice.
Ultimately, weigh your options carefully and choose the method that best fits your needs and expectations.
Thank you for reading, and best of luck with your window tinting project!
For top-quality window tinting services in Fort Worth and surrounding areas, trust AUTO PRO DFW. Our experienced professionals ensure a flawless finish, superior materials, and excellent customer service.
Contact us today at (817) 330-4413 or fill out our online quote form to get started. Enhance your vehicle’s comfort, privacy, and style with AUTO PRO DFW!